Navigating the mobile landscape in Zimbabwe can be quite a challenge, especially when it comes to finding the best SIM card for apps. Whether you’re an entrepreneur who relies on communication apps, a social media enthusiast, or someone who needs constant access to the internet for your work, the right SIM card can make a significant difference in your day-to-day activities.
Identifying Your App-Based Needs
The first step in finding the best SIM card for apps in Zimbabwe is understanding your specific needs. Here’s a quick breakdown:
- If you frequently use WhatsApp, Facebook, Twitter, or Telegram for both personal and business communications, you’ll need a SIM card that provides consistent data and call coverage.
- If you work remotely and need constant access to apps like Zoom or Google Drive for professional purposes, you’ll want a plan that emphasizes high-speed internet.
- If you rely heavily on navigation apps like Google Maps or GPS-based ride-sharing services, you need a SIM with reliable data connectivity.
Recognizing these needs will streamline your search and help you pick a plan that truly fits your lifestyle and work habits.
Quick Reference
Quick Reference
- Immediate action item with clear benefit: Switch to a local SIM card for better network coverage and faster data speeds.
- Essential tip with step-by-step guidance: Check online customer reviews and forum discussions for real-world user experiences before finalizing your choice.
- Common mistake to avoid with solution: Do not overlook the importance of data caps and hidden charges; always read the fine print.
Detailed Guide: How to Choose the Best SIM Card for Apps
Selecting the best SIM card for apps in Zimbabwe requires a detailed understanding of the various service providers and plans available. Here’s how to go about it:
Step 1: Research Service Providers
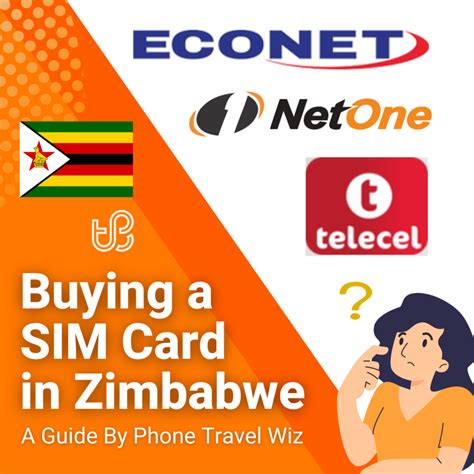
Start by researching the three main telecom service providers in Zimbabwe: NetOne, Econet, and Telone. Each provider offers various packages tailored to different user needs.
- NetOne is well-known for its good network coverage in urban areas and its competitive data plans.
- Econet is often preferred for its extensive 4G LTE coverage and wide range of app-friendly packages.
- Telone, though less prominent, has been working to improve its network and offers good data packages as well.
To get a comprehensive overview, compare their latest offers and read up-to-date reviews from users who have experienced the services firsthand.
Step 2: Evaluate Data Plans
Once you’ve narrowed down your choices, look into the specific data plans offered by each provider. Here are some points to consider:
- Data Usage: Determine how much data you typically use per month. Providers offer different packages from 1 GB to 10 GB and higher.
- Speed: Note that speeds can vary; 3G and 4G packages are widely available but ensure you’re looking at 4G or LTE for the best speeds.
- Duration: Check if the data is valid for a week, month, or a longer duration. Longer-duration plans often provide better value for money.
- Price: Compare the costs to ensure you’re getting the best value for your money.
Practical Tip: Look for providers that offer unlimited data packages or generous rollover data. These options can save you money if you use data intensively.
Step 3: Assess Network Coverage
Network coverage can be a make-or-break factor when choosing a SIM card. Visit areas where you usually spend your time and check for service availability.
Check online forums, or even call customer support to verify that the provider’s network is strong in your preferred areas. This ensures your data plans and app usage won’t be interrupted.
Step 4: Read the Fine Print
While choosing a SIM card, be sure to read the fine print about any potential hidden charges, data caps, and contract obligations.
- Be wary of packages that have sneaky charges for international roaming or data usage outside the agreed-upon limits.
- Check if the provider offers a straightforward and hassle-free cancellation policy in case you’re unsatisfied.
- Look for any additional charges for premium services, such as high-definition streaming or international calls.
Avoiding these pitfalls can save you a lot of inconvenience later.
Step 5: Activate and Test Your SIM Card
After you’ve chosen your provider and plan, purchase the SIM card and activate it. Most providers offer easy online activation processes:
- Visit the provider’s website and follow the instructions to activate your SIM card.
- Top up your account if required to get your plan activated.
- Test your connectivity by downloading apps like WhatsApp, Zoom, or Google Maps to ensure everything works smoothly.
If any issues arise during activation or testing, contact customer support immediately for assistance.
Practical FAQ
What are some common pitfalls to avoid when choosing a SIM card?
When choosing a SIM card for apps, several common pitfalls can lead to unexpected problems. Here’s how to avoid them:
- Ignoring network coverage: Always check the provider’s network coverage in your primary areas of use to avoid interruptions.
- Overlooking hidden charges: Thoroughly read the terms and conditions to avoid unexpected extra fees.
- Choosing based solely on price: While it’s important to get good value for your money, also ensure the service quality and network reliability are up to par.
- Neglecting data caps: Some plans have data caps that can be easily reached if you’re an avid app user, leading to slowdowns or extra charges.
By avoiding these common mistakes and carefully considering your app usage habits, you can select the SIM card that best meets your needs and ensures a seamless app experience in Zimbabwe.